The camber rods that come with the RPM LST Upper A-arms must be installed according to the instructions in order to achieve the maximum amount of camber adjustment. If the rod is threaded too far into one side or the other, you will loose a certain amount of camber adjustment but that can easily be fixed. The following photos show the proper distances for a visual check not available in the instruction sheet. Please refer to the instruction sheet that comes with the RPM LST A-arms for instructions not listed here. This FAQ should be used as a reference and supplemental to the instruction sheet supplied with your RPM A-arms.
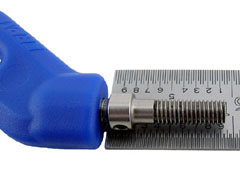
Photo #1 shows the camber rod threaded into the main A-arm at the proper length of approximately 15/16″ (0.935″) from the end of the A-arm to the far end of the camber rod. Note that the shoulder of the camber rod is still about 3/32″ away from the edge of the A-arm.
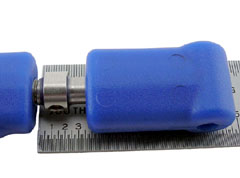
Photo #2 shows the A-arm completely assembled at the starting point listed in the instructions. The distance between the two A-arm parts is approximately 3/8″ (0.370″). It is important to note that the side of the camber rod that has the shoulder is actually inside of the second part of the A-arm. No threads are showing outside of the A-arm. This is normal and designed to be this way.
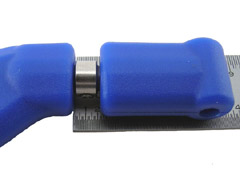
Photo #3 shows the assembled A-arm completely threaded in to the maximum camber position with approximately a 3/16″ gap (0.200″ of the camber rod is still showing for approximately 3/16″ of adjustability in the negative direction). With the camber rod installed properly, you will have the full range of camber adjustments available to you. If you have installed a set of RPM A-arms on your LST and you can’t get the camber to adjust to an angle close to 3 degrees of negative camber (you will never need anything more than 3 degrees of negative camber for nearly any type of racing or bashing environment), you have threaded the camber rod into one side or the other too far and it has bottomed out. Determine which side is threaded in too far and adjust that side out while adjusting the opposite side in the same amount of turns to maintain the proper distance between parts. That should correct the lack of camber adjustment.


